In our last blog post, we told you how we added sprinklers and raised planters to our backyard. In this post, we’ll show you the finishing touches we made to the backyard by adding shrubs, trees, and flowers.
After building our raised planters, it was time to fill them with plants. We added plenty of compost and tilled it into our planter beds to ensure the plants would have rich soil in which to grow. Then we went to one of our local nurseries, Plant World, to shop for plants. We bought several shrubs including: indian hawthorne, red-tipped photinia, and crepe myrtle.
We got two fruit trees, a Fuji apple tree and a Montmorency cherry tree. We bought several decorative trees including a purple leaf plum tree, a crabapple tree, a Japanese pagoda tree, and a lacebark elm tree.
We also planted mounding rose bushes, heirloom garden roses, and hybrid tea roses.
Once we put all of our plants in, we ran dripper hoses and covered them with mulch to ensure the soil stayed moist.
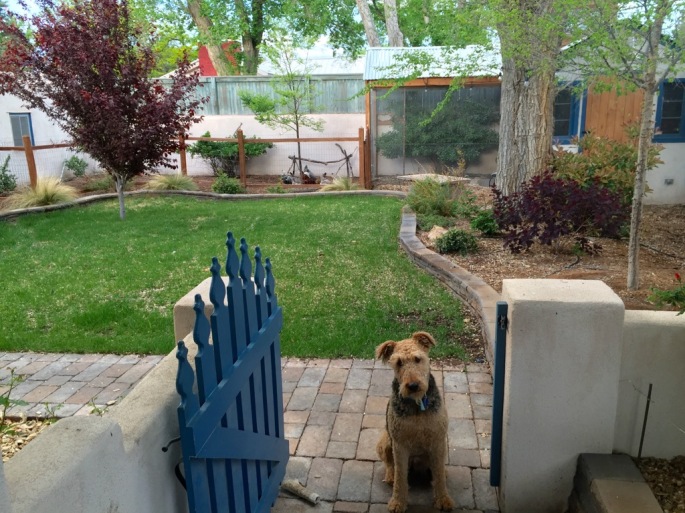
Here are some pictures of the final result. As you can see in the pictures below, one of our Airedale Terriers, Olive, loves to be in pictures 🙂
Hopefully this post gave you some ideas if you are thinking of doing some landscaping. Stay tuned to the blog, we’ll be posting more about some of our home re-decoration projects.
In our last post, we told you how we created a new landscaping design for our backyard and removed the old landscaping. Today, we’ll show you how we added sprinklers to water the grass we added to the yard and created raised planter beds.
After we cleared the old landscaping and tilled compost into our backyard, we added raised planter beds around the perimeter of the yard. We wanted to surround our yard with trees, shrubs, and flowers and this was why we chose to add in generously sized planters all around the yard.
To add the raised planters, we dug a trench to create a foundation for the planter walls. The depth of the foundation was about the height of one of our retaining wall blocks plus four inches. It’s important to ensure that your trench is level. Once it’s level, you add a few inches of gravel. Then you add sand and ensure that the layer of sand is level. You can then start laying your retaining wall blocks. We used ones similar to these. We had a pretty shallow retaining wall that was the height of two retaining wall blocks (one layer of which was largely buried in the trench) topped by a layer of capping blocks. We glued each layer of blocks together with construction glue to ensure the retaining wall remained stable. Because our raised planter had a curved design, Tony had to cut our retaining wall blocks with a tile saw to ensure the blocks fit together snugly.
After we completed the retaining wall, Tony dug trenches in the middle area of the yard to add sprinkler pipes. We wanted to plant grass in this area and in New Mexico you need sprinklers if you want your grass to survive. We rented a trench digger from Home Depot to create our trenches. Laying sprinkler pipe is tricky, because you have to ensure that your sprinklers are going to be able to reach all of your grass. You also want to ensure that your sprinklers won’t hit windows and cause water damage. For us, it was particularly tricky to figure out how to place our sprinklers because we created an irregularly shaped area for our grass. We were able to design a configuration that worked, but knew that if we had to install sprinklers again in the future, we would probably not design such an irregularly shaped area. If you are thinking of installing sprinklers on your own, it’s important to consult a DIY guide like this one.
Once our sprinklers were installed, we added a fenced area adjacent to our chicken coop. We wanted to give our chickens more room to roam around while also ensuring that they didn’t have access to the new plants and grass we were going to plant. Once our fence was completed, we planted grass seeds in the middle area of our yard.
In our next blog post, we’ll show you how the yard looked after the grass had grown in and we’ll show you the trees, shrubs, and flowers we planted.
My husband, Tony, and I first became interested in getting backyard chickens in 2011. At the time, we were living in a house with a backyard that was about 2000 square feet. We wanted our chickens to have plenty of space, and also needed a storage shed for some of our landscaping tools and equipment. We decided to build a coop with an attached shed in the corner of our yard.
Our first step was to draw plans for the coop. We designed the coop to match the house with the same stucco color and trim color. We wanted a roof that was durable against water damage, so we opted for a pitched corrugated tin roof. Tony also liked the idea of having a cupola. We thought the cupola would not only look nice, but would also provide for good ventilation, which is very important in regulating the temperature of a chicken coop. We added antique hinged windows into our design to provide further ventilation and beautiful design element.
Once we had the dimensions and design of the coop completed, Tony started digging the foundation.
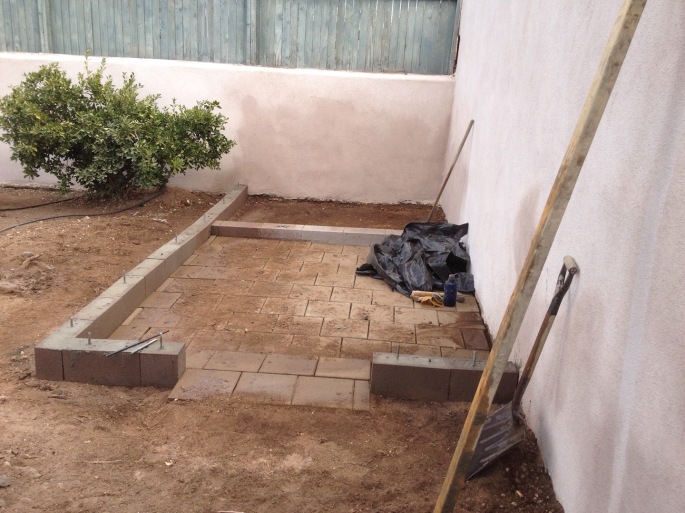
First, Tony leveled the ground. Then, he dug a trench for the footing. He laid down square concrete pavers to form the flooring of the storage shed portion of our chicken coop. We left a dirt floor for the chicken coop itself because it is easier to use the deep bedding method when you have a dirt floor. The deep bedding method is essentially a way to compost the chicken waste. Once there is enough waste in the bottom of the coop, you shovel it out and add more sawdust, leaves, or wood chips. You can use the waste you removed from your coop to fertilize your garden beds.
After Tony dug the trench, he drove rebar vertically into it at intervals of about two feet, measuring the intervals to ensure that the rebar would go into the cinder blocks that would form the foundation. He also laid rebar horizontally inside the trench to ensure the foundation would be strong and stable. Once the rebar was in place, Tony mixed concrete and poured it into the trench to create the footing. He let the concrete cure for a couple of days. He then laid cinder blocks on top of the cured concrete and poured more concrete into and around the blocks and let that layer cure. Finally, he laid a second layer of blocks, poured concrete into and around them and inserted anchor bolts vertically, one bolt in each block, while the concrete was wet. He leveled the concrete with a trowel before leaving it to cure for about two days.
Once the third layer of concrete was cured, our foundation was complete.
In our next blog post, we’ll tell you how we created the frame of chicken coop.
This post contains affiliate links. Please see our disclosure statement for more information about the affiliate links used in this blog.
One thing I’ve gotten into recently is making my own kombucha. Kombucha is a fermented tea drink that contains probiotics. There are quite a few websites about brewing kombucha, but this blog post will provide you with unique and useful kombucha brewing techniques that I haven’t seen described on other websites (including the use of a fish tank heater).
I mainly became interested in Kombucha because it contains probiotics that promote good health in many ways. According to health.harvard.edu, probiotics improve immune function, help prevent infection by protecting you against harmful bacteria, improve digestion, and promote absorption of nutrients.
Many health food stores carry kombucha, but it’s expensive. Around where I live, stores sell kombucha for about $3.00 for a 16 ounce bottle. If you make kombucha yourself, you can brew a gallon for about $1.50 after the price of your initial starter materials.
There are many ways to begin brewing your own kombucha. I made my first batch by purchasing a starter kit on Amazon. Starter kits are handy because they make the brewing process very simple and straightforward. If you feel confident, however, you can forgo the brewing kit and just purchase these materials:
I found tips for brewing kombucha from three main sources: kombuchakamp.com,The Big Book of Kombucha, and the basic instructions that were included in my starter kit. I highly recommend consulting these sources before you start brewing kombucha. There are several ways that the brewing process could go wrong, and your kombucha could end up being harmful rather than healthy. It’s important to know the details about how to safely brew kombucha before you start your first batch.
The very important key to making kombucha is to use clean, sterilized utensils and vessels. You will use your kombucha SCOBY over and over for months or years. If any harmful bacteria enters at any stage of the brewing process, the SCOBY can get contaminated, which means you can get contaminated when you drink your kombucha. If you ever feel that your kombucha might have gotten cross-contaminated at any stage of the brewing process, it’s best to start over with a new SCOBY and new starter liquid.
Here is the single batch brewing process I used for my first kombucha batches:
Boil 4 cups of water in a medium saucepan.
When water has reached a rolling boil, remove it from the burner.
Place a tea ball or a tea sachet containing 3 tablespoons of loose leaf tea into the pan. I use a blend of this green tea and black tea.
Steep the tea for 5 – 6 minutes.
Remove the tea ball and add 1 cup of organic sugar to the pan. Stir until the sugar is dissolved.
Add the 4 cups of sweet tea you made into a one gallon glass jar.
Add cold, non-fluorinated water to the glass jar, leaving about 2 inches of space at the top.
Measure the temperature of the tea.
When the temperature is anywhere between 68 – 84 degrees Fahrenheit, you can add your SCOBY and one cup of starter liquid.
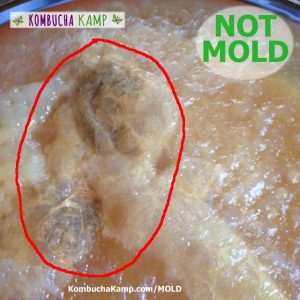
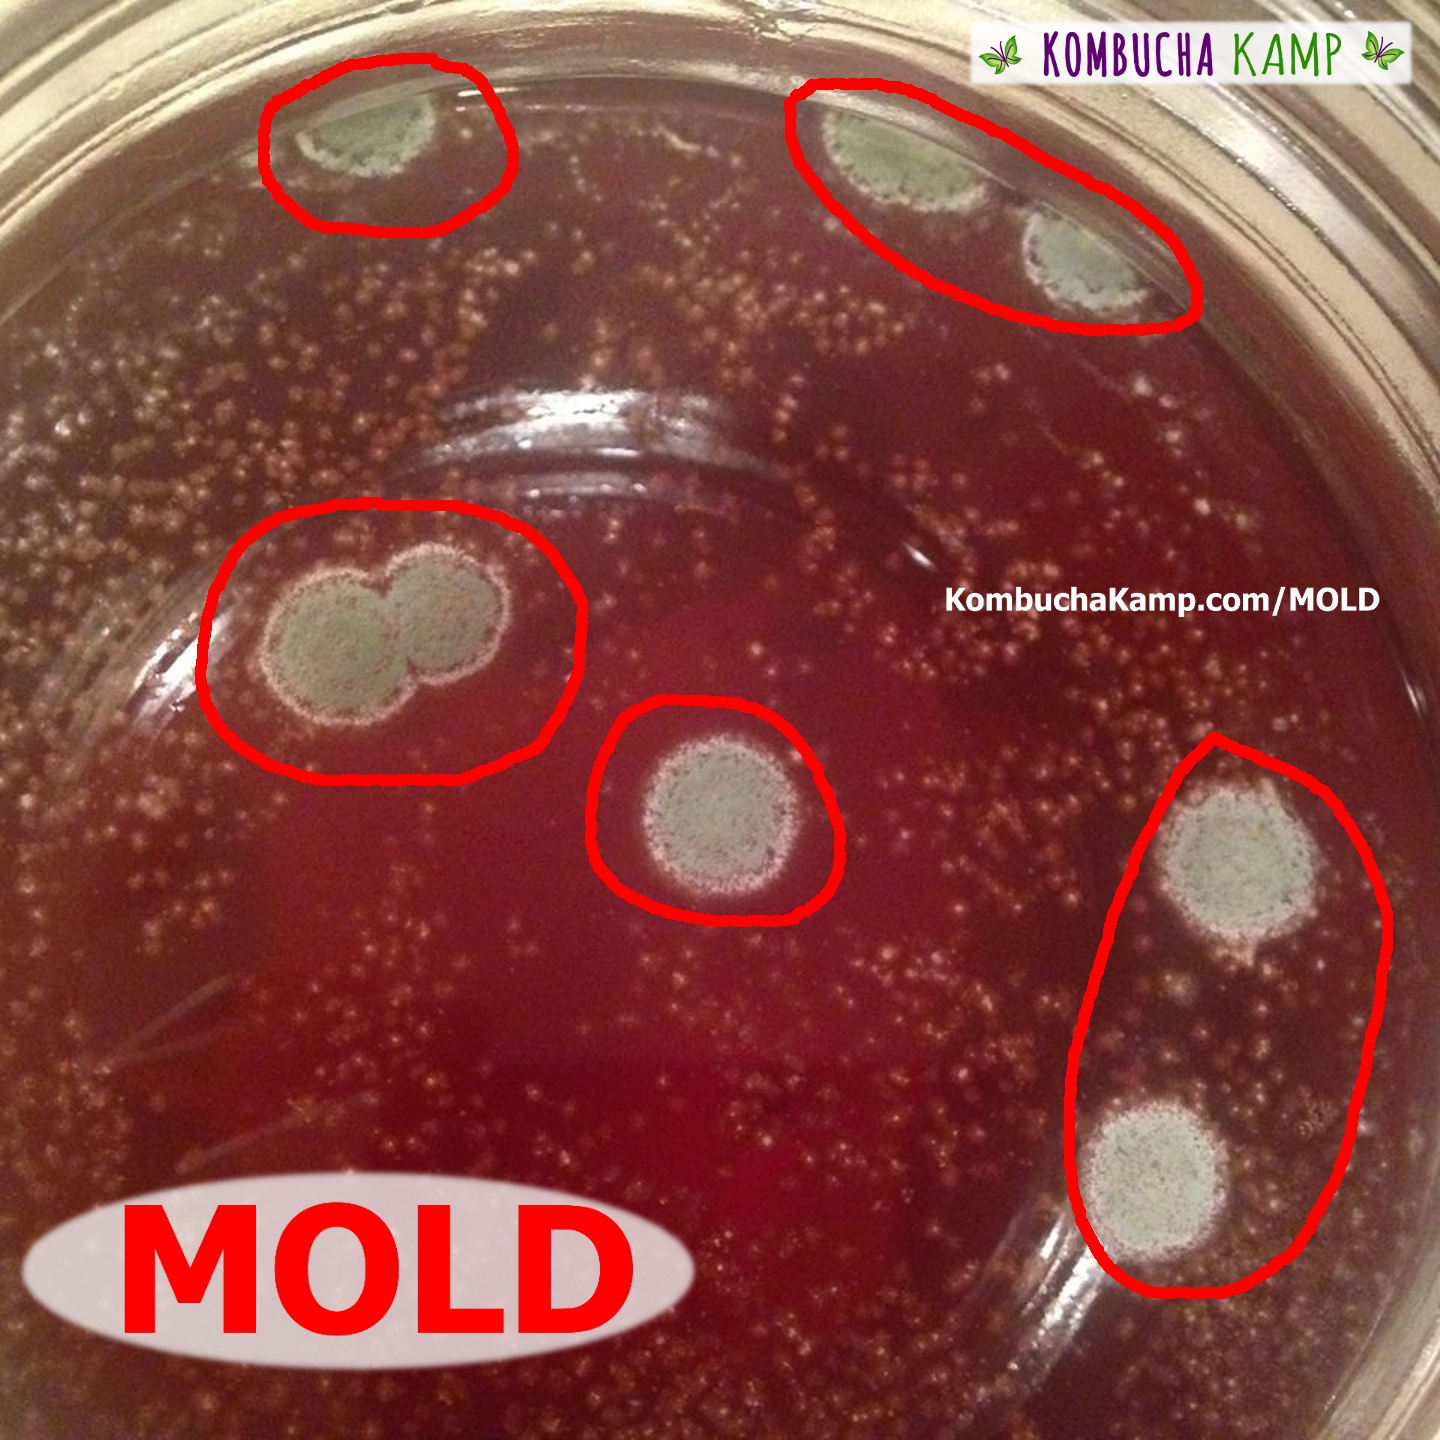
Secure a cotton cloth with a rubber band over the opening of the jar and leave your kombucha to brew for 7 – 21 days. The temperature needs to remain between 68 and 84 degrees F to ensure the SCOBY stays healthy and doesn’t grow mold.
Test your kombucha after 7 days. If it is too sweet, leave it to brew for a couple more days and test it again. You can also measure the pH level using pH testing strips. Kombucha should ideally be between a 2.5 to 3.5 pH level before you bottle it.
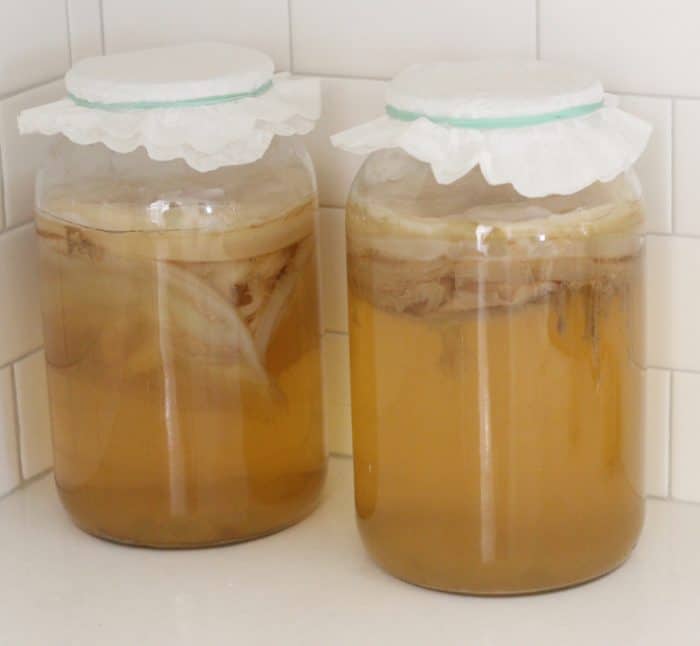
Once the kombucha tastes right and has the right pH level, bottle it, leaving 1 cup of the liquid for brewing your next batch. You can use clean, empty, store-bought Kombucha bottles you saved or you can buy new bottles.
When you’ve bottled your kombucha, make another batch of sweet tea to add to the jar to keep your SCOBY alive and healthy.
If you regularly drink more than one gallon of kombucha per week, you can use the continuous brewing method to make bigger batches. You can read more about this method at the Kombucha Kamp website.
Here are three key things I have learned through my experience in brewing kombucha.
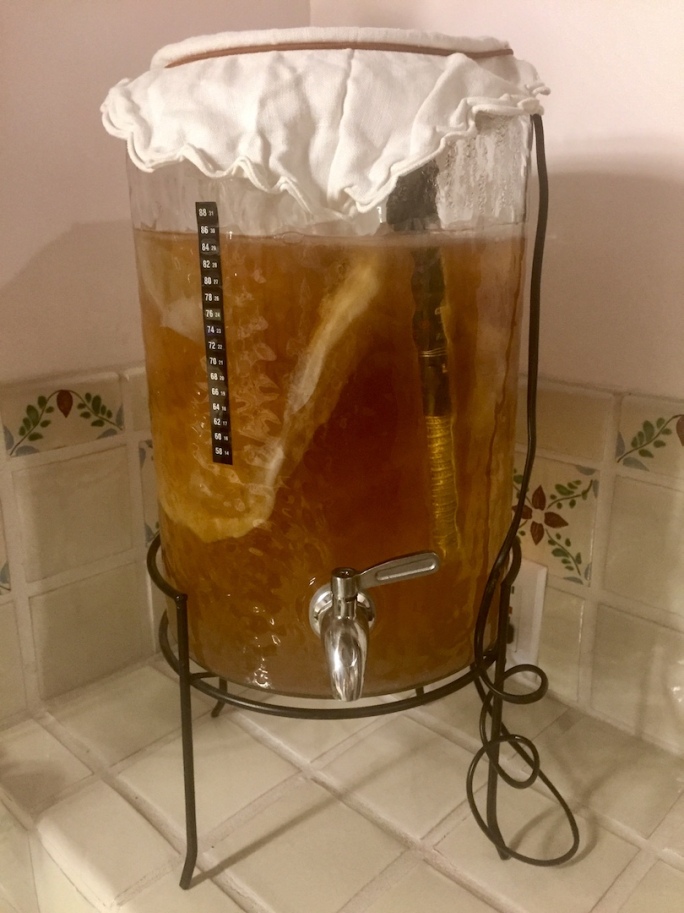
It is difficult to keep the brew warm enough in the winter months. Many of the kombucha websites recommend using a heating pad to keep your kombucha the right temperature, but I didn’t want to resort to keeping a heating pad plugged in all day everyday to protect my kombucha. After talking about this problem with my husband, Tony, he proposed an ingenious solution: use a fish tank heater. These heaters are made to be constantly submersed in liquid, they are made of kombucha-friendly glass (not plastic), and they have their own built-in thermostat. In the first picture in this post, you can see the fish tank heater I’m keeping in my kombucha over the winter.
You can find affordable high-quality organic loose leaf tea that works great for kombucha without having to buy loose leaf tea labeled “Kombucha Tea” that sells for more than twice as much.
The continuous brewing method is much easier than the single batch brewing method if you know you will drink more than a gallon of kombucha per week. The key to the continuous brewing method is to make time every week to bottle your kombucha and add new sweet tea to keep your SCOBY alive and well.
I hope this information is helpful to you kombucha lovers! I’ve had success with my kombucha brewing process and saved a lot of money by making it myself.
The final step in remodeling the patio of our previous house was to fill the planters we created with shrubs, flowers, and ground cover plants. In the first phase of our patio remodel project Tony laid pipes in the ground so that we could run dripper lines in our planters. In New Mexico, because it’s so dry, dripper lines are key to keeping your plants watered and making sure they don’t die. With our dripper lines in place and functioning, we were ready to plant.
Tony and I both love roses and evergreen shrubs. Roses grow really well in central New Mexico, so we bought several rose bushes. We got pink, red, and fuchsia Knock Out rose bushes. These rose bushes were easy to grow and grew quickly. They are not very fragrant, however, so we also bought a fragrant Melody Parfumée rose. In addition, we got some petunias and pansies.
We bought a couple of evergreen bushes including red tipped Photinia and Indian Hawthorne shrubs. We planted an English Ivy vine in the far corner of the patio. We also added several ground cover plants. One of our existing trees had died, so we replaced it with a Japanese Pagoda tree. This tree did very well in our high desert climate.
Here are some pictures of the patio after we finished the entire remodeling project.
One of our Airedale Terriers, Olive, loves to be in pictures 🙂
Hopefully our series of posts on remodeling our patio gave you some ideas if you’re embarking on your own project!
If you’re like me you’ve seen (and drooled over) pictures of beautiful hanging planters on the internet. You know the ones I’m talking about.
nordichouse.co.uk
PigeonToeCeramics
PigeonToeCeramics
anthropologie.com
Maggie Boyd
Williams Sonoma
I love a good hanging planter! Unfortunately, the ones I like all seem to be super expensive. I’ve also had a hard time finding hanging planters that are large, or even medium-sized.
In the last several blog posts, I showed you how we remodeled our sunroom. Through that whole remodeling process we kept trying different types of hanging plants to place in front of the windows. We like the idea of indoor hanging plants because they add beautiful greenery to any room and because our dogs can’t reach them. One thing we’ve discovered about Airedale Terriers is that they eat just about anything, including plants.
After giving up trying to find reasonably priced hanging planters, I asked Tony to help me make our own. Here’s how we did it.
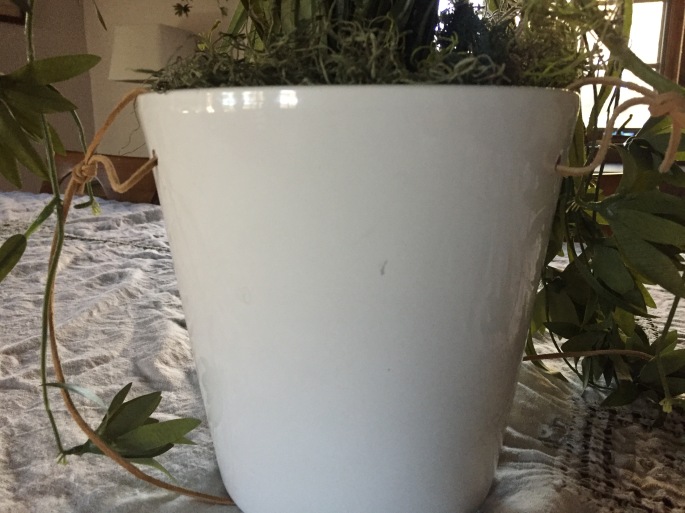
Find a container you like. We found these at Lowe’s. They are no longer in stock, but you can find similar ones here. If you choose to hang real plants, you might want your container to have drainage holes and an attached drip tray. We chose a container without a drip tray because we used fake plants.
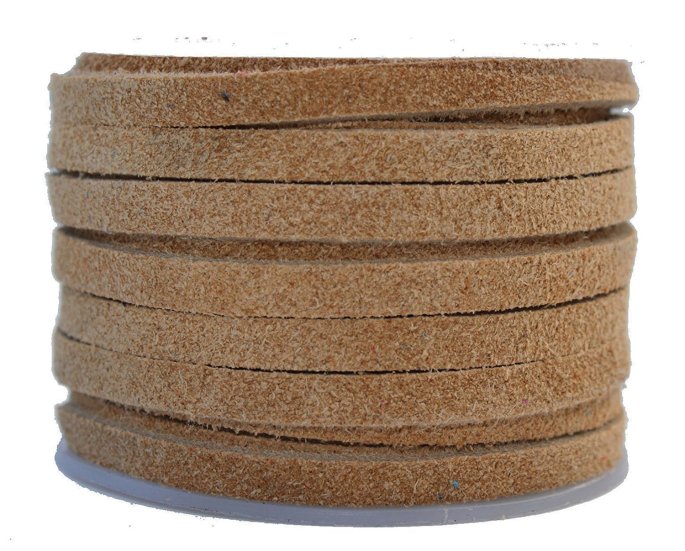
2. Buy leather cord, faux leather cord, or heavy-duty twine. The leather cord we purchased was similar to this.
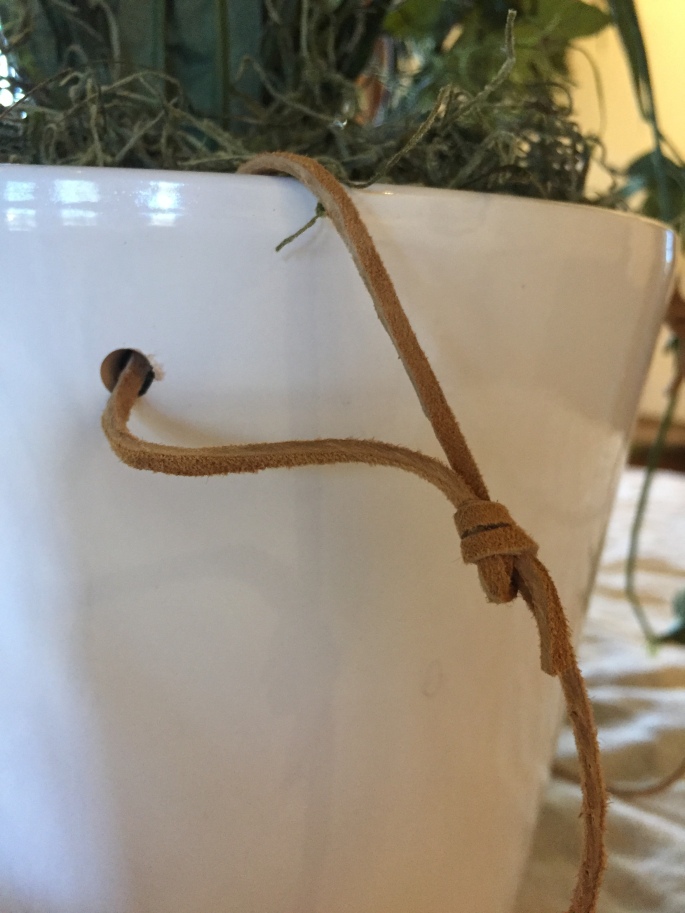
3. Drill three equidistant holes into your ceramic planter at least 1 inch from the top rim.
4. Cut three equal lengths of leather cord. Thread one these leather cord pieces through each of the holes in the planter and make sure you tie them tightly.
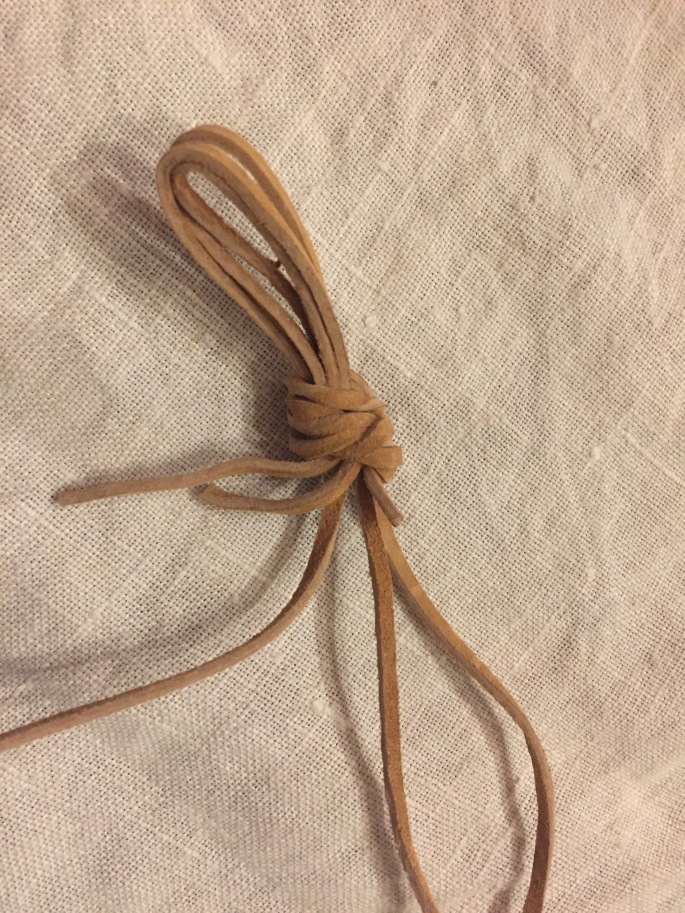
5. Tie the three leather cords together at the top, leaving a loop.
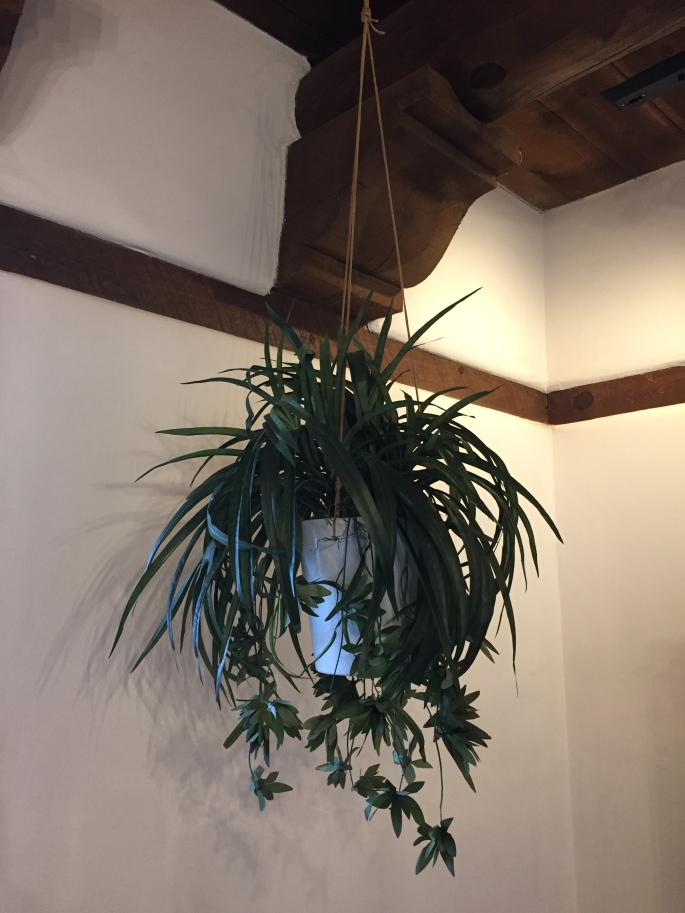
6. Choose which type of plant you want to hang. We went with fake spider plants we purchased at Michael’s. We would have preferred having real plants, but it wasn’t possible because we knew we wouldn’t water them frequently enough and if we spilled too much water it would mess up our non-water-resistant floor.
7. Hang the planter/s from a hook that is stably anchored into the ceiling.
Hope this post has given you ideas about your own DIY possibilities for hanging planters! We’ve enjoyed ours 🙂